
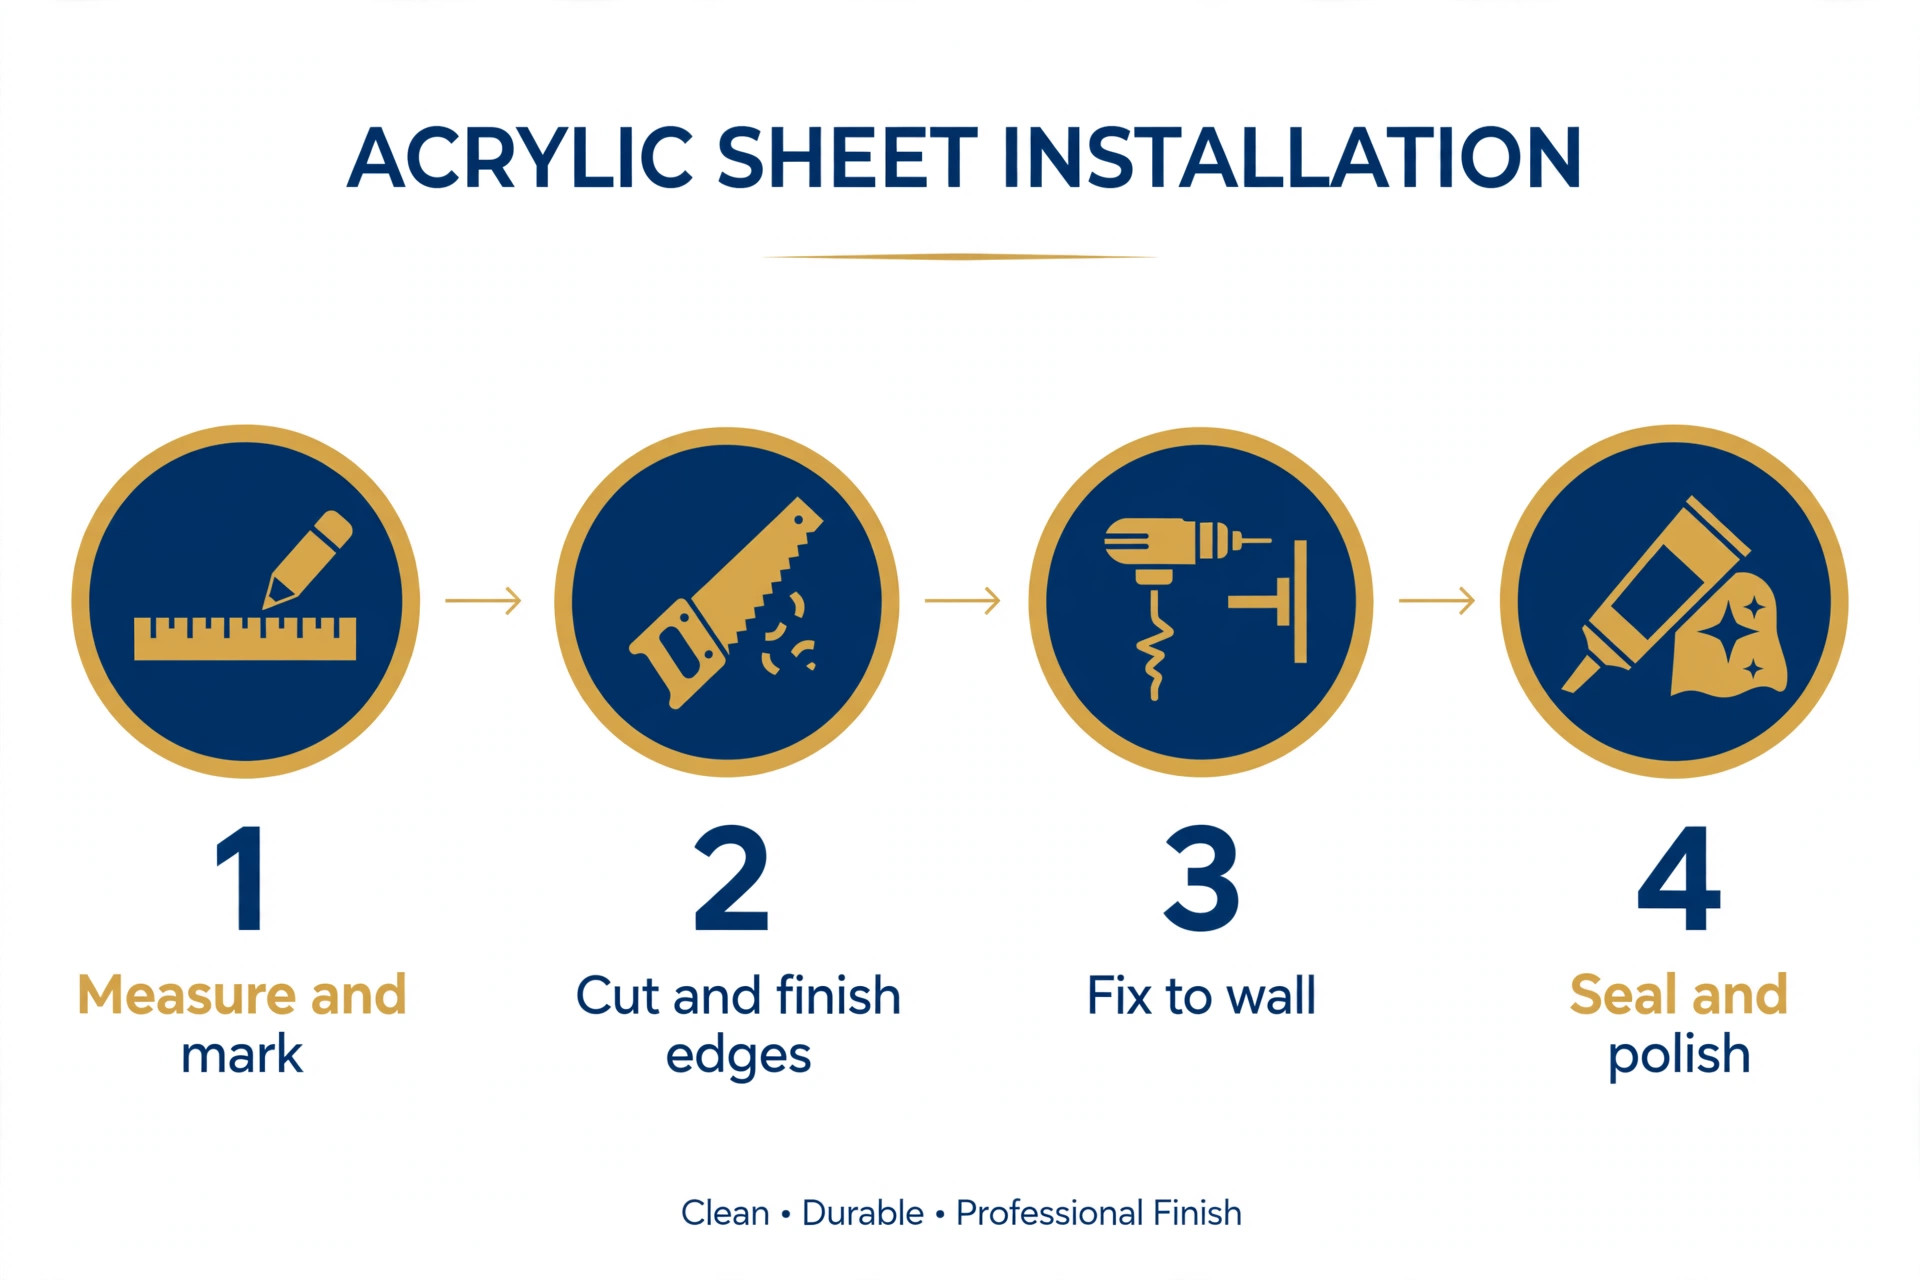
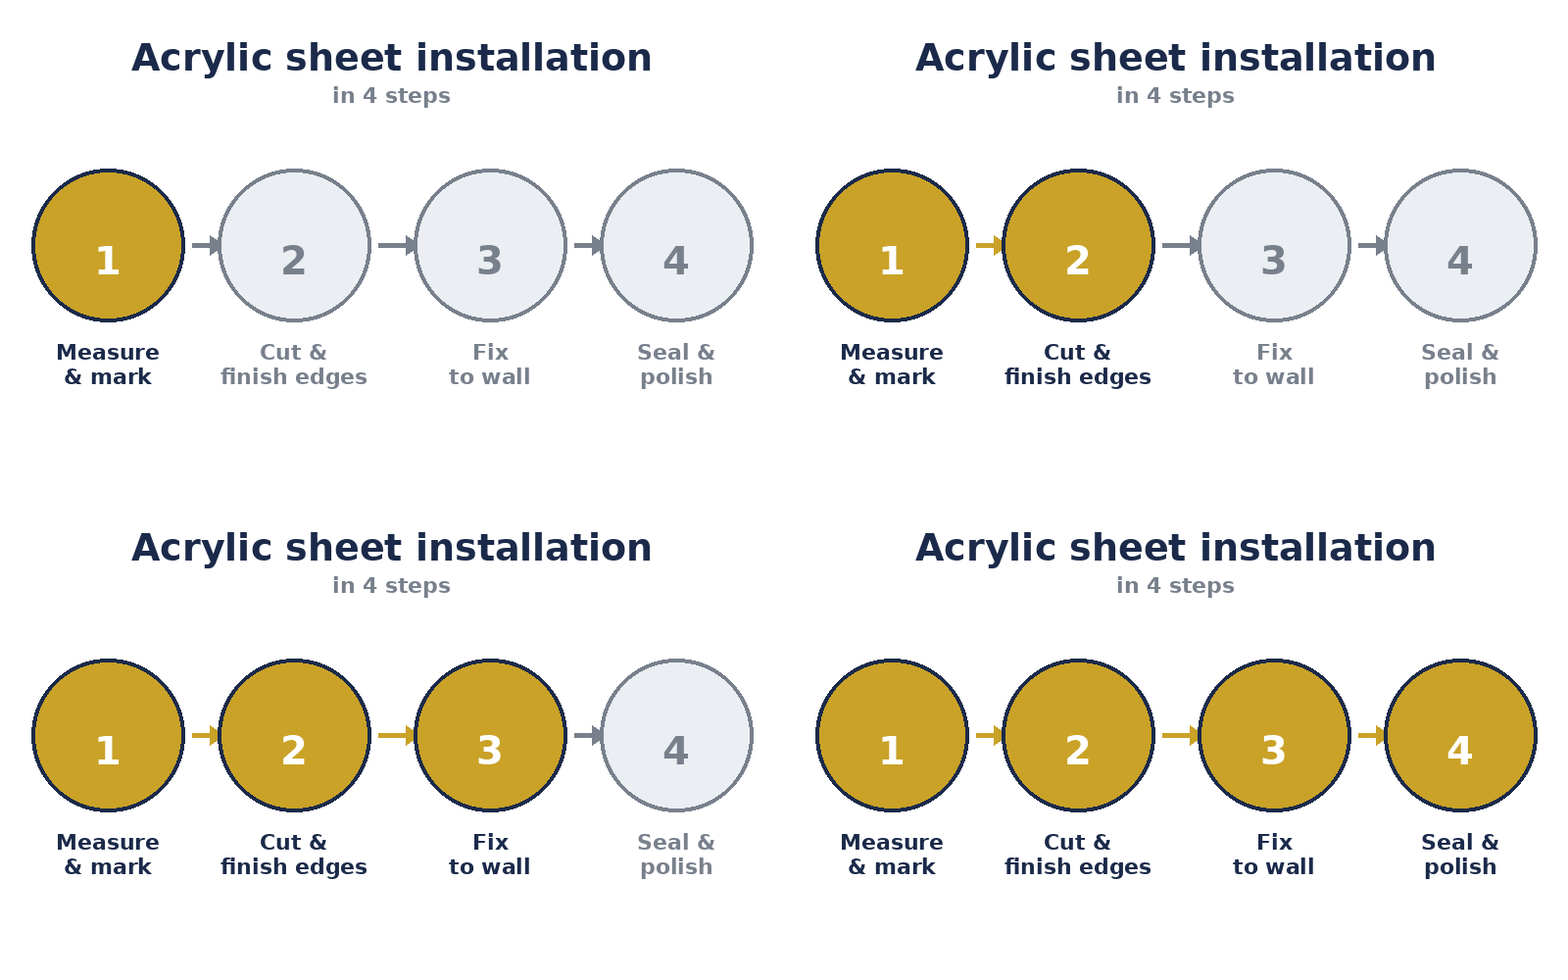
Short answer: Acrylic sheet installation in a UAE home usually takes a single day for a feature wall: the installer measures and marks the wall, cuts the sheets to size with polished edges, fixes them with adhesive or mechanical fixings, then seals, polishes and cleans up. Good site prep matters as much as the fixing itself, and most problems come from rushed measuring or the wrong adhesive, not from the material. After install, gentle cleaning with soap and water keeps the finish looking new.
Before acrylic sheet installation: getting the site ready
A smooth installation starts before the installer arrives. The wall needs to be clean, dry and as flat as reasonably possible. Acrylic is unforgiving of bumps: on a high-gloss sheet, even a small ridge in the plaster underneath will show as a distortion in the reflection. If the wall has loose paint, flaking plaster or old wallpaper, that should be dealt with first.
Clear the room. Furniture should be moved at least a couple of metres from the wall, and anything valuable covered, because cutting and polishing create fine dust. In UAE villas this is usually straightforward, but in apartments with tight access, check that full-size sheets can actually get through the doorways and corridors. Sheet sizes are generous, and a sheet that does not fit around a stairwell turn is a problem you want to discover before install day, not during it.
If you live in a rented apartment, check with your landlord or building management about fixing anything to the walls. Most are fine with adhesive-fixed cladding since it can be removed with far less damage than drilling, but getting the okay in writing avoids arguments later.
Step 1: measure and mark
Everything good about the finished wall comes from this step. The installer measures the wall in several places, not just once, because few walls are perfectly square. In older Abu Dhabi villas especially, a wall can be a centimetre or two out from one end to the other, and the layout has to absorb that difference gracefully.
The sheet layout is planned on the wall with light pencil or tape marks: where each sheet lands, where the seams fall, and how edges meet corners, sockets and switches. Good planning puts seams in natural breaks or in symmetrical positions, never randomly across the middle of the wall. Electrical points get marked so cutouts land exactly right. This is also when the installer confirms the sheets on site match what was ordered: correct color, correct finish, UV-stabilized grade if the wall sees sun.
Step 2: cut and finish the edges
Acrylic sheets are cut with fine-toothed saws or CNC equipment for complex shapes. The key detail is the edge finish. A freshly cut acrylic edge looks cloudy and rough, so each cut edge is polished back to clarity or to a clean satin finish depending on the design. This is skilled, unhurried work: rushing it leaves visible flaws along every seam.
Cutouts for sockets and switches are made now, slightly oversized so faceplates sit cleanly over them. If the design includes curves, for example around a column, the sheet is gently heat-formed. Acrylic becomes pliable when warmed, which is one of its real advantages over glass, but it takes experience to heat it evenly without scorching or distorting the surface.
Protective film stays on the face of every sheet through all of this. It only comes off at the very end. If you ever watch an installer peel film off early for a quick look, that is a small red flag: one stray scratch during handling and the gloss is marked before the job is even finished.
Step 3: fix the sheets to the wall
There are two main fixing methods, and the right one depends on the wall and the sheet size.
Adhesive fixing is the most common for interior feature walls. A high-quality neutral-cure adhesive is applied to the back of the sheet in a pattern that allows air to escape, the sheet is offered up to the wall, leveled, and held until the adhesive grabs. The adhesive choice matters enormously: the wrong product can craze or discolor acrylic over time, which is one of the classic failures of rushed low-quality installations.
Mechanical fixing uses screws with decorative caps or a slim framing system. It suits heavier sheets, uneven walls that needed battens, or commercial settings where panels may need to come off for maintenance access behind them. The caps become part of the design, so they are usually color-matched.
Whichever method is used, the installer works sheet by sheet, checking level and alignment constantly. Acrylic shows misalignment mercilessly: a sheet that is a degree off at the bottom is visibly off at the top. Spacers keep seam gaps consistent, and any expansion gap at the perimeter is planned in, because even stable materials move slightly with temperature.
Step 4: seal, polish and clean up
Once all sheets are fixed, seams are sealed where needed, edges get a final polish, and the protective film finally comes off. This is the moment the wall transforms: the gloss appears all at once and the room changes character.
Then comes cleanup. Acrylic dust from cutting is fine and clings to everything, so a thorough wipe-down of the room is part of a professional job, not an extra. The installer should walk you through the finished wall, pointing out seam positions and explaining the cleaning routine: soft cloth, soap and water, nothing abrasive. That two-minute handover prevents most of the damage we hear about later, because many scratches happen when someone cleans a new glossy wall like it was ceramic tile.
How long does acrylic sheet installation take
For a single feature wall in a villa living room, a professional team usually completes the job in one working day, assuming the wall was prepped and the sheets were cut or pre-cut correctly. Larger projects, a full restaurant interior or several rooms, run over multiple days, but the rhythm is the same: measure, cut, fix, finish.
What stretches timelines is almost never the fixing itself. It is waiting on wall prep, discovering the wall is badly out of true, or sheets arriving in the wrong finish and needing replacement. A good installer flags these risks at the site visit stage, before install day is even booked. If your installer wants to start work the same day as the first site visit, without measuring twice, be cautious.
What goes wrong with bad installation
Most acrylic failures trace back to installation, not the material. The common ones:
Wrong adhesive. Solvent-heavy or acidic adhesives can craze the back of the sheet, showing as fine cracks or cloudy patches months later. Neutral-cure products made for plastics are the safe choice.
No expansion gaps. Butted tight with zero room to move, sheets can bow or pop adhesive bonds when temperatures swing. The UAE’s indoor-outdoor temperature difference makes this more relevant than in milder climates.
Fixing over an uneven wall. Every bump telegraphs through gloss acrylic as a visible distortion. Skimming or battening the wall first is not optional on wavy plaster.
Sloppy seams. Uneven gaps and cloudy unpolished edges are the visual signature of a rushed job. They cannot be fixed after the fact without replacing sheets.
Peeling film too early. Scratches picked up during handling, before the final clean, stay forever.
None of these are mysterious. They are all avoided by an installer who measures carefully, uses the right consumables and does not rush the finishing.
Aftercare in the first few weeks
The first month sets the pattern. Keep abrasive cleaners far away: no scouring pads, no harsh chemicals, no alcohol-heavy sprays on colored sheets. A microfiber cloth with mild soap and water handles everything from dust to fingerprints.
Watch the seams and edges as the room goes through its first hot weeks. Tiny settling is normal; anything opening up visibly deserves a call back to the installer while the work is fresh. Reputable installers expect this and would rather adjust a sheet early than have an unhappy client later.
If the wall is in direct sun, this is also when you confirm the UV-stabilized grade is doing its job. There should be no color shift in the first season. Fading or yellowing in the early months points to the wrong grade being supplied, which is a supply problem to take up with whoever provided the sheets.
DIY or professional acrylic sheet installation
Acrylic looks deceptively simple: flat sheets, stick them on the wall. In practice, the cutting, edge polishing and layout planning are where the skill lives, and the tools for clean fabrication are not typical DIY kit. A confident DIYer can manage small panels, like a kitchen backsplash, with careful measuring and the right adhesive.
For feature walls, large sheets, cutouts around electrics, or anything in direct sun where the grade specification matters, professional installation pays for itself. The material itself performs impressively, about 92% light transmission, roughly 17 times the impact resistance of glass at about half the weight (QUANDA Plastic), but those properties only shine when the sheets are cut cleanly and fixed correctly.
Frequently asked questions
How long does acrylic sheet installation take?
A single feature wall typically takes one working day for a professional team, provided the wall is prepped and sheets are ready. Multi-room or commercial projects take longer, but the per-wall rhythm stays the same.
Can acrylic sheets be installed over existing tiles?
It depends on the tiles. If they are firmly bonded, flat and clean, adhesive fixing over them is often possible. Loose, cracked or heavily textured tiles should come off first, because movement underneath will telegraph through the acrylic.
What adhesive is used for acrylic sheets?
A neutral-cure adhesive formulated for plastics. Solvent-based or acidic products can craze and discolor acrylic over time, so the adhesive specification is one of the most important details to get right.
Do acrylic walls need expansion gaps?
Yes, small ones at the perimeter. Even dimensionally stable materials move slightly with temperature, and the gap prevents bowing or popped bonds. A good installer plans these into the layout invisibly.
How soon can I clean the wall after installation?
Once the adhesive has cured, usually within a day or two, gentle cleaning with a soft cloth and soap and water is fine. Avoid any abrasive products from the start and the finish will stay glossy.
What should I check before the installer leaves?
Walk the wall together. Check seams are even, edges are polished, sockets and switches sit cleanly in their cutouts, and the room is wiped down. Ask for the cleaning routine in plain words: soft cloth, soap and water, nothing abrasive.
Planning an acrylic feature wall, kitchen backsplash or office branding wall? Start with our complete guide to acrylic cladding in the UAE to pick your finish, then see the full material range on our PVC and acrylic sheet page. Message us on WhatsApp at +971 55 281 9239 for a free site visit and quote. Our showroom at Capital Mall, Mohamed Bin Zayed City is open daily from 10 AM to 10 PM.